Overview:
The Transfer Order feature allows organisers to move an existing order from one event to another without creating a new order manually. This helps preserve order records while allowing the order to be moved to the destination event.
This guide walks you through the process of transferring an order to a different event.
To use the order transfer feature, organisers must have the Manage Orders permission enabled. Do note that this feature is only available in the new grid experience.
Enable the Order Transfer
This is an add-on feature. To enable it for your event or organisation, please contact:
- Support: cs@gevme.com
- Your Gevme Account Manager or sales@gevme.com
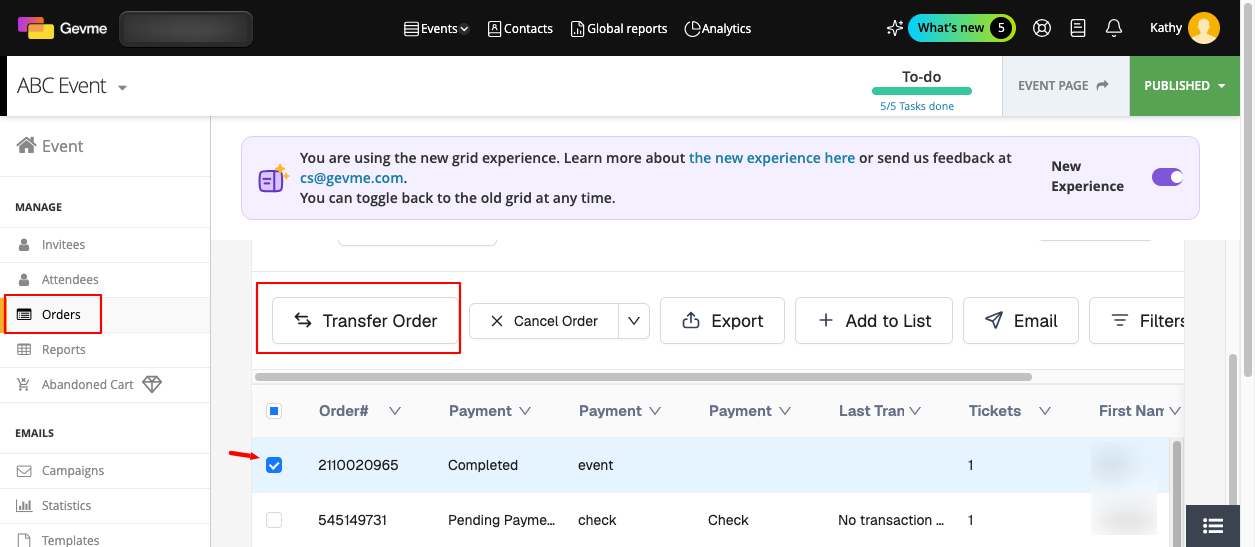
Once enabled, navigate to Orders → select the Order that you wish to take action on → you will see the option Transfer Order
Before You Begin
Before transferring an order, ensure the following prerequisites are met:
- You have organiser access to both the source event and the destination event.
- The destination event contains the appropriate ticket types that the transferred tickets will be mapped to.
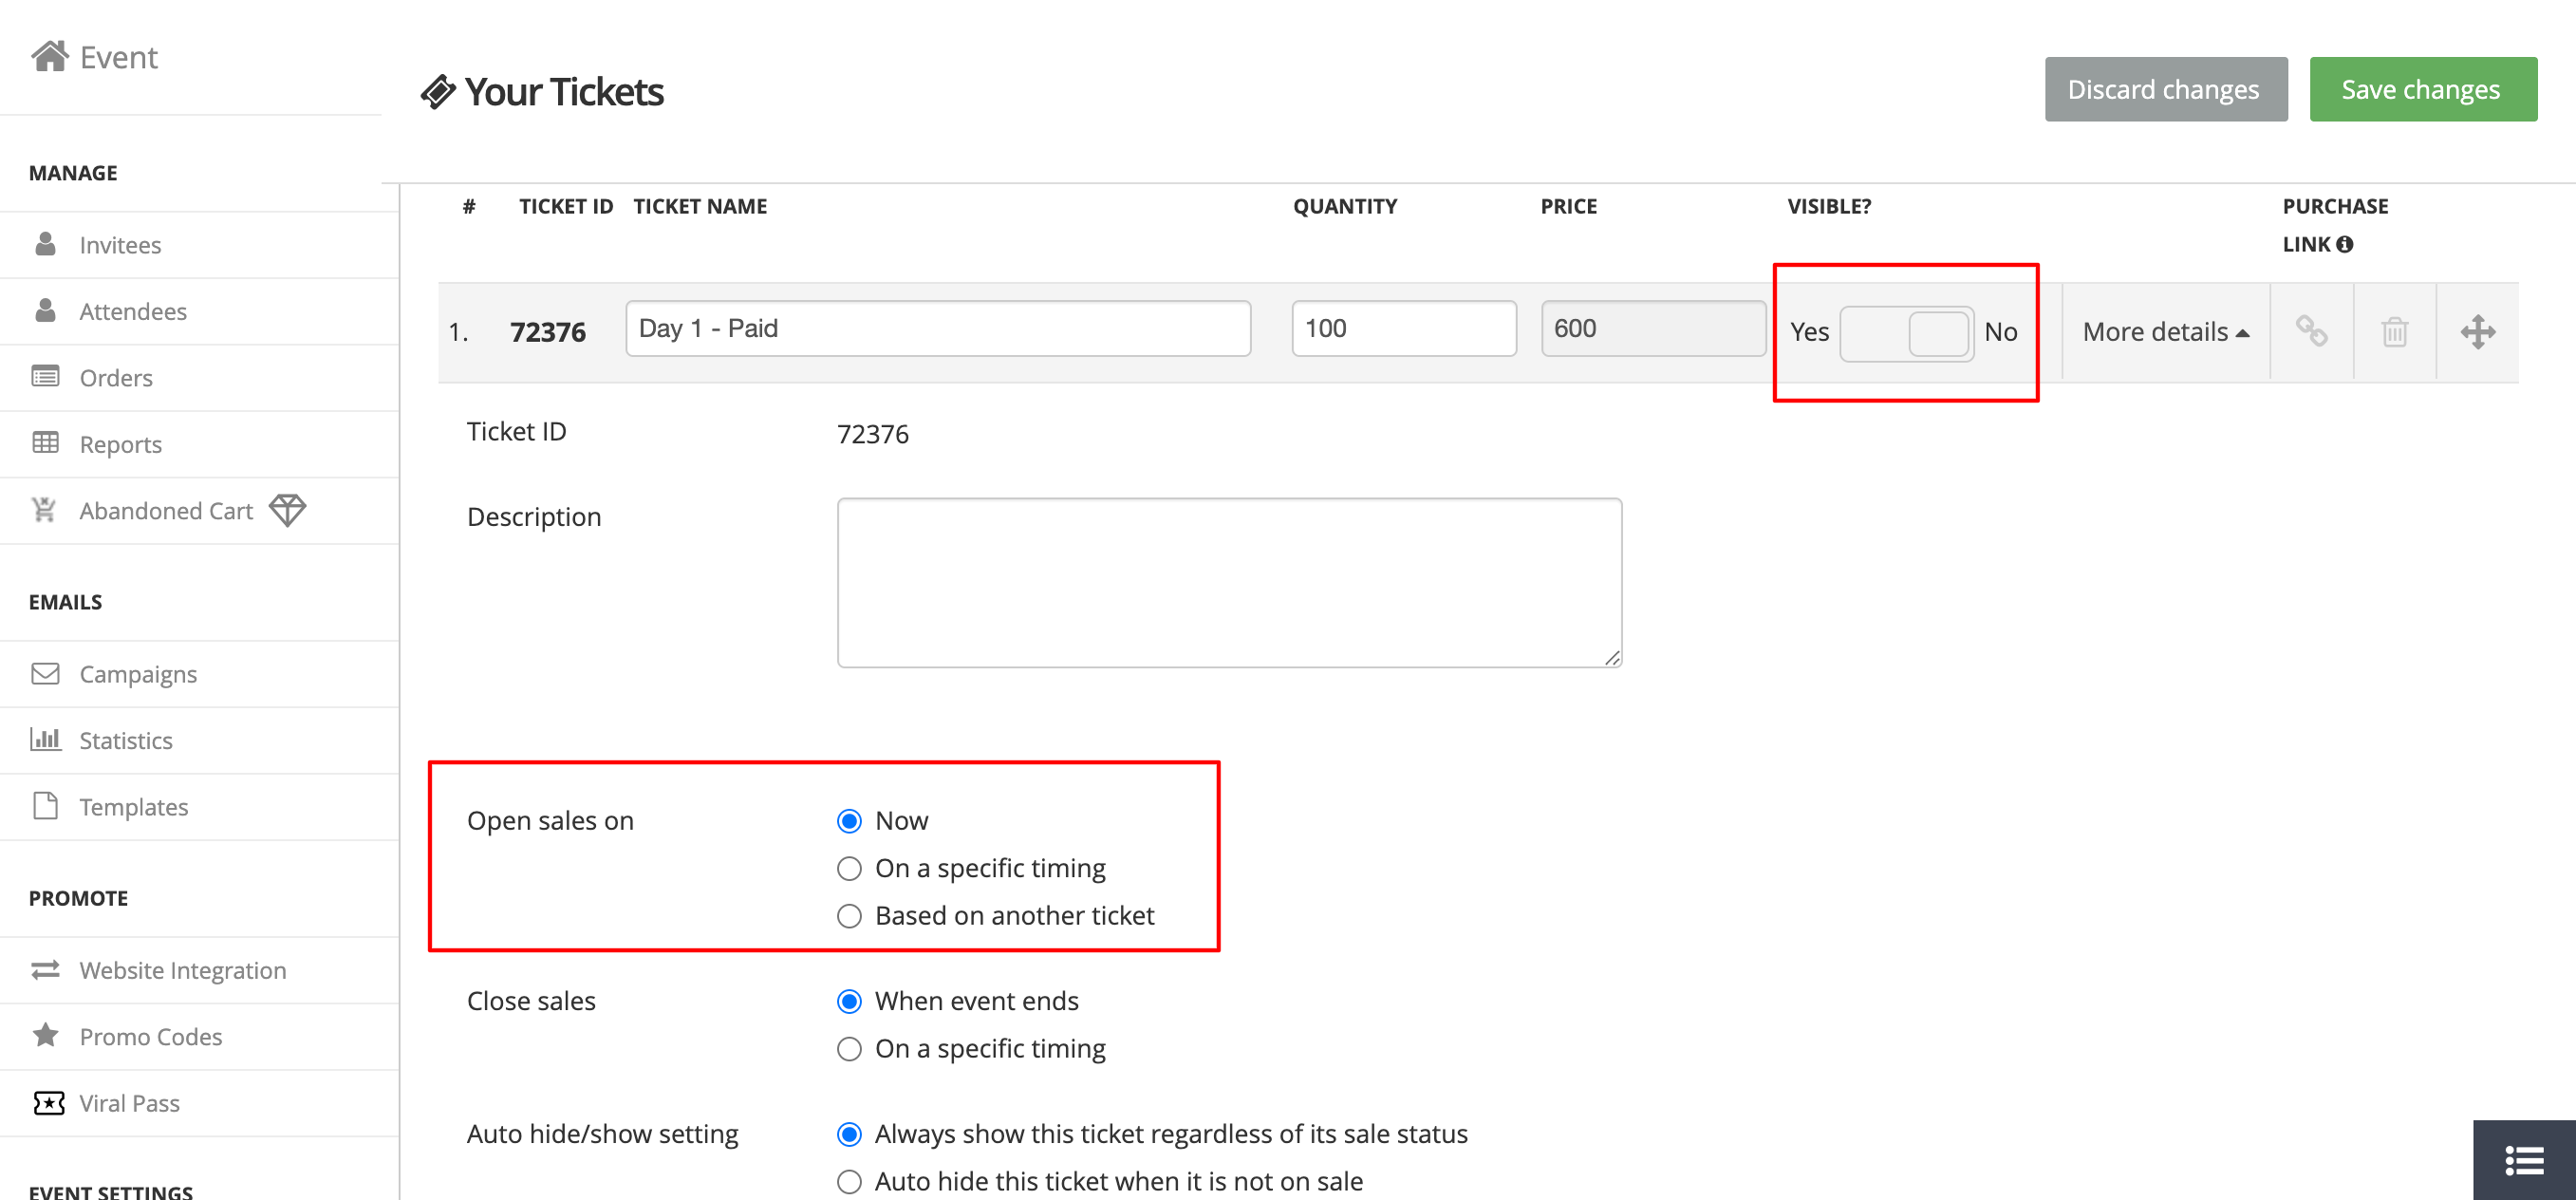
- The destination ticket is available for transfer. Verify that:
The Ticket Sales Period is active.
The ticket has sufficient availability to accommodate the transferred order.
Note: If ticket sales have already ended, you can temporarily extend the Ticket Sales Period while setting the ticket Visibility to Hidden. This allows the transfer to proceed without making the ticket available for public purchase.
Step-by-Step Instructions:
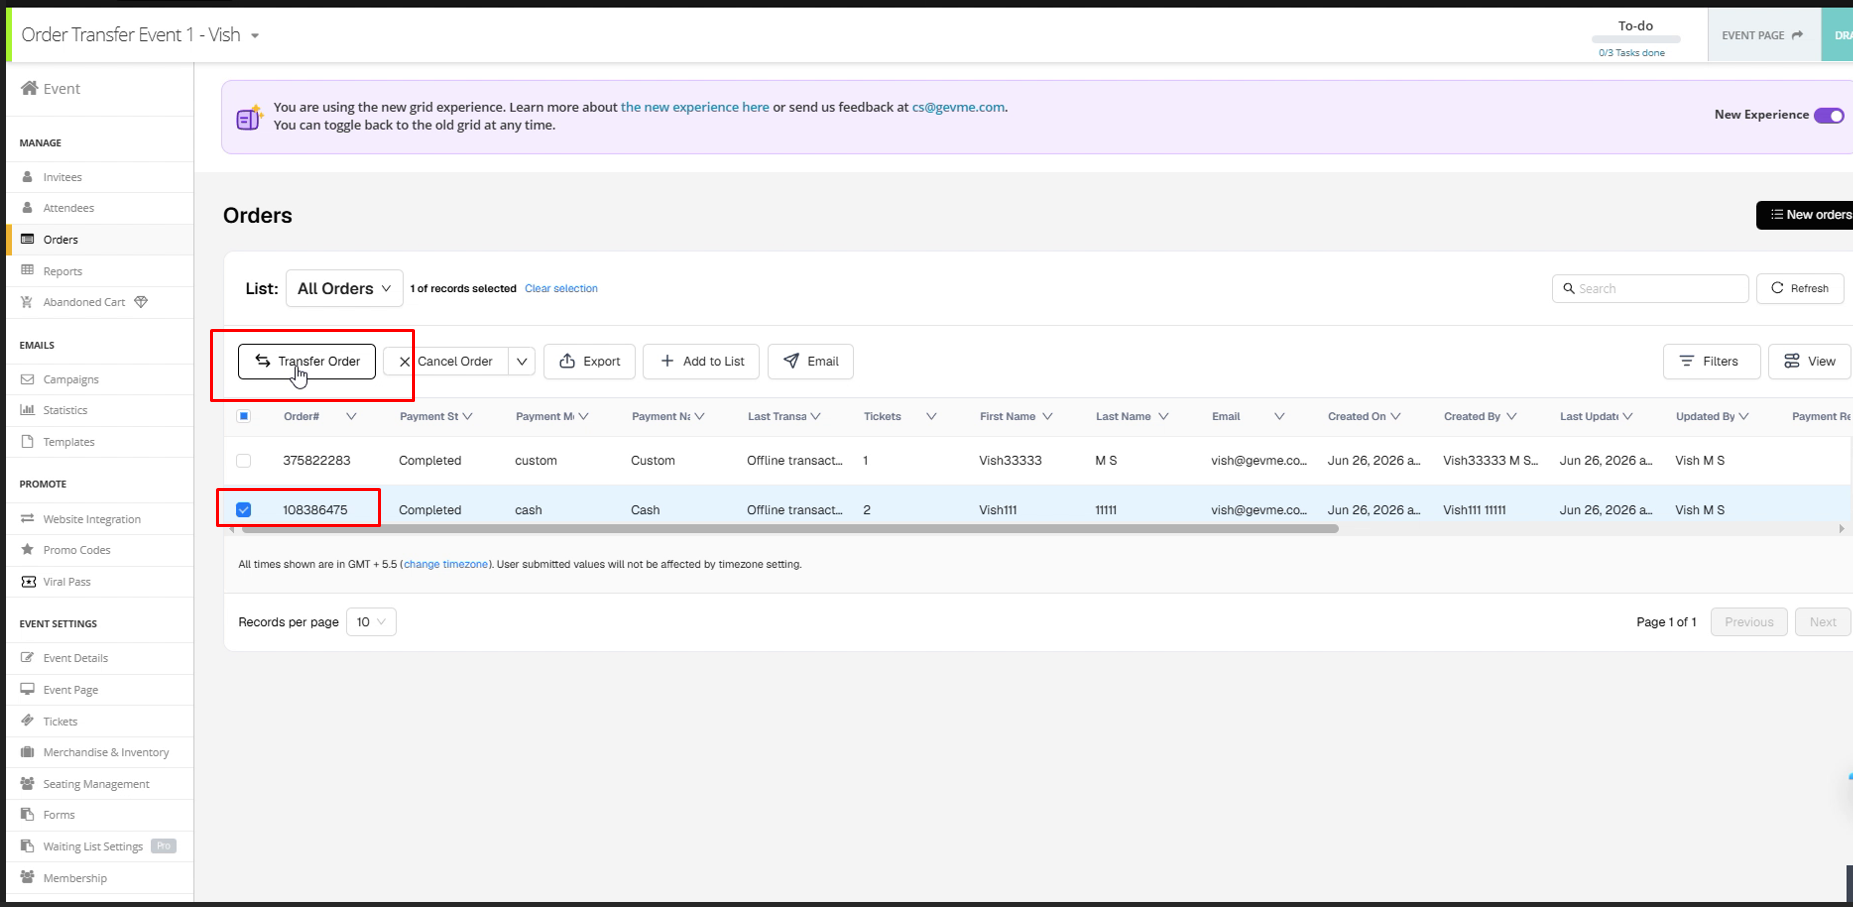
1. Locate and Select the Order
Navigate to the source event and open the Orders list.
Locate the order you want to transfer and select it.
2. Initiate the Transfer
Click Transfer Order from the available actions.
A transfer wizard will open to guide you through the process.
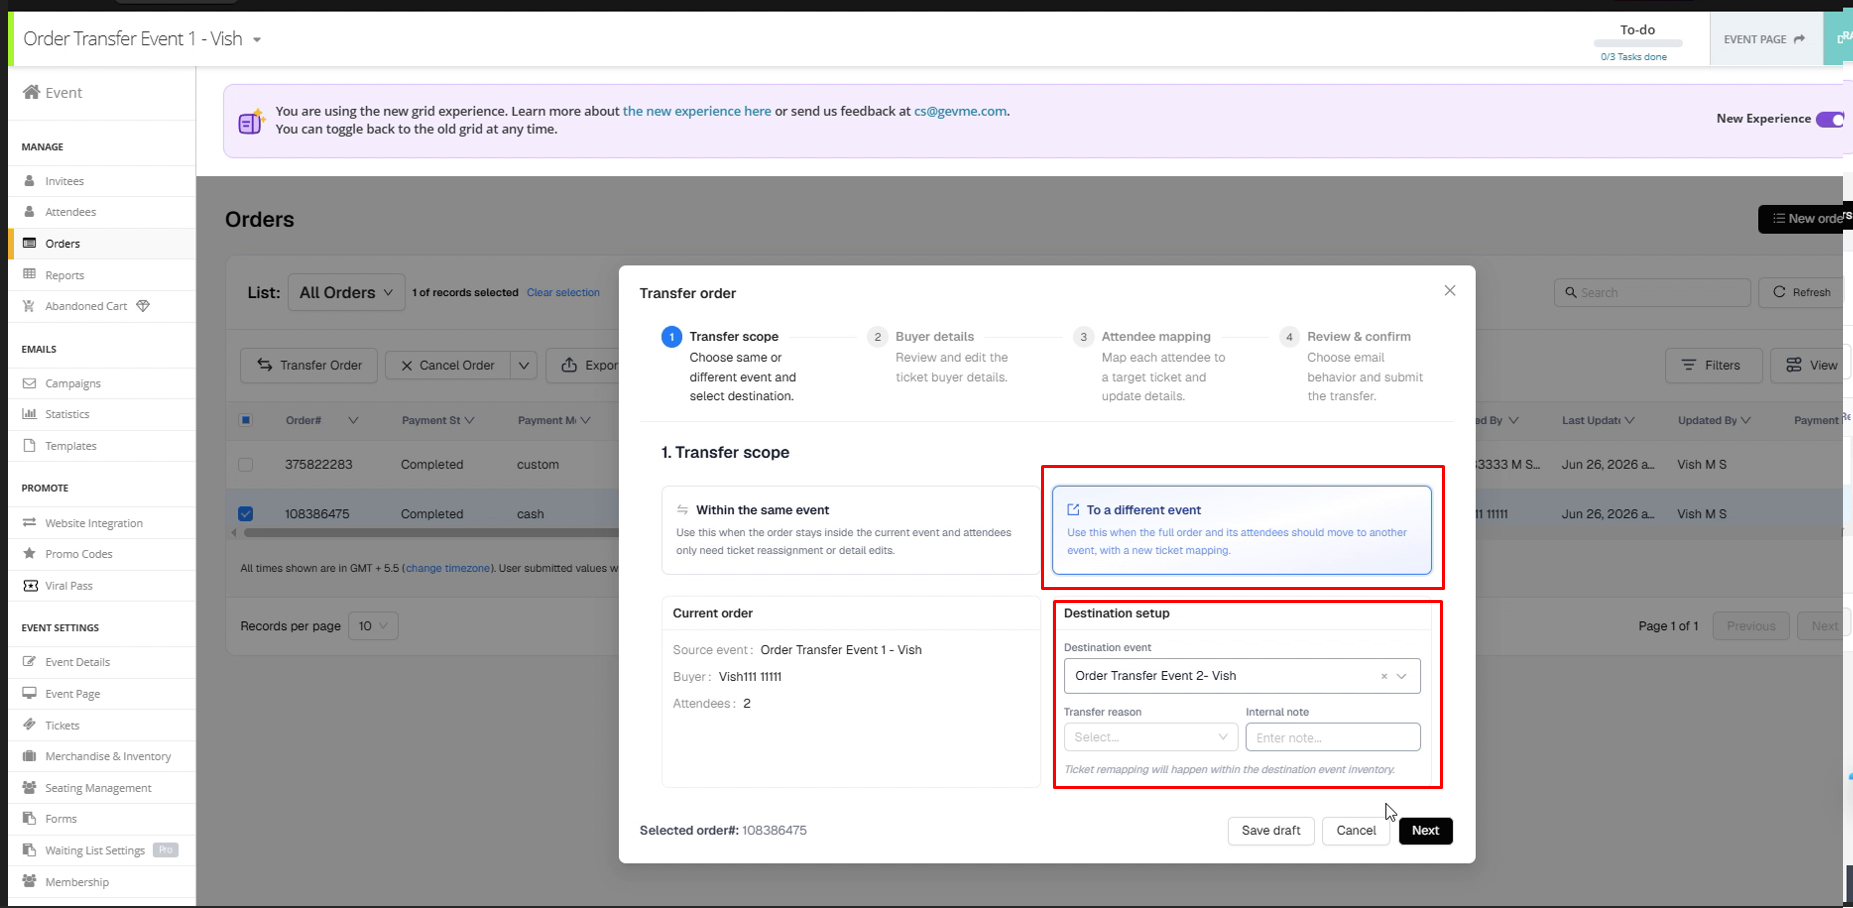
3. Define the Transfer Scope
Under Transfer Scope:
- Choose the Destination Event.
- (Optional) Enter a Transfer Reason and any Internal Notes for future reference.
- Click Next.
4. Update Buyer Details
Review the buyer details.
- You may update the buyer's name and email address if the order is being transferred to a different purchaser or if the information needs to be corrected.
- Click Next to continue.
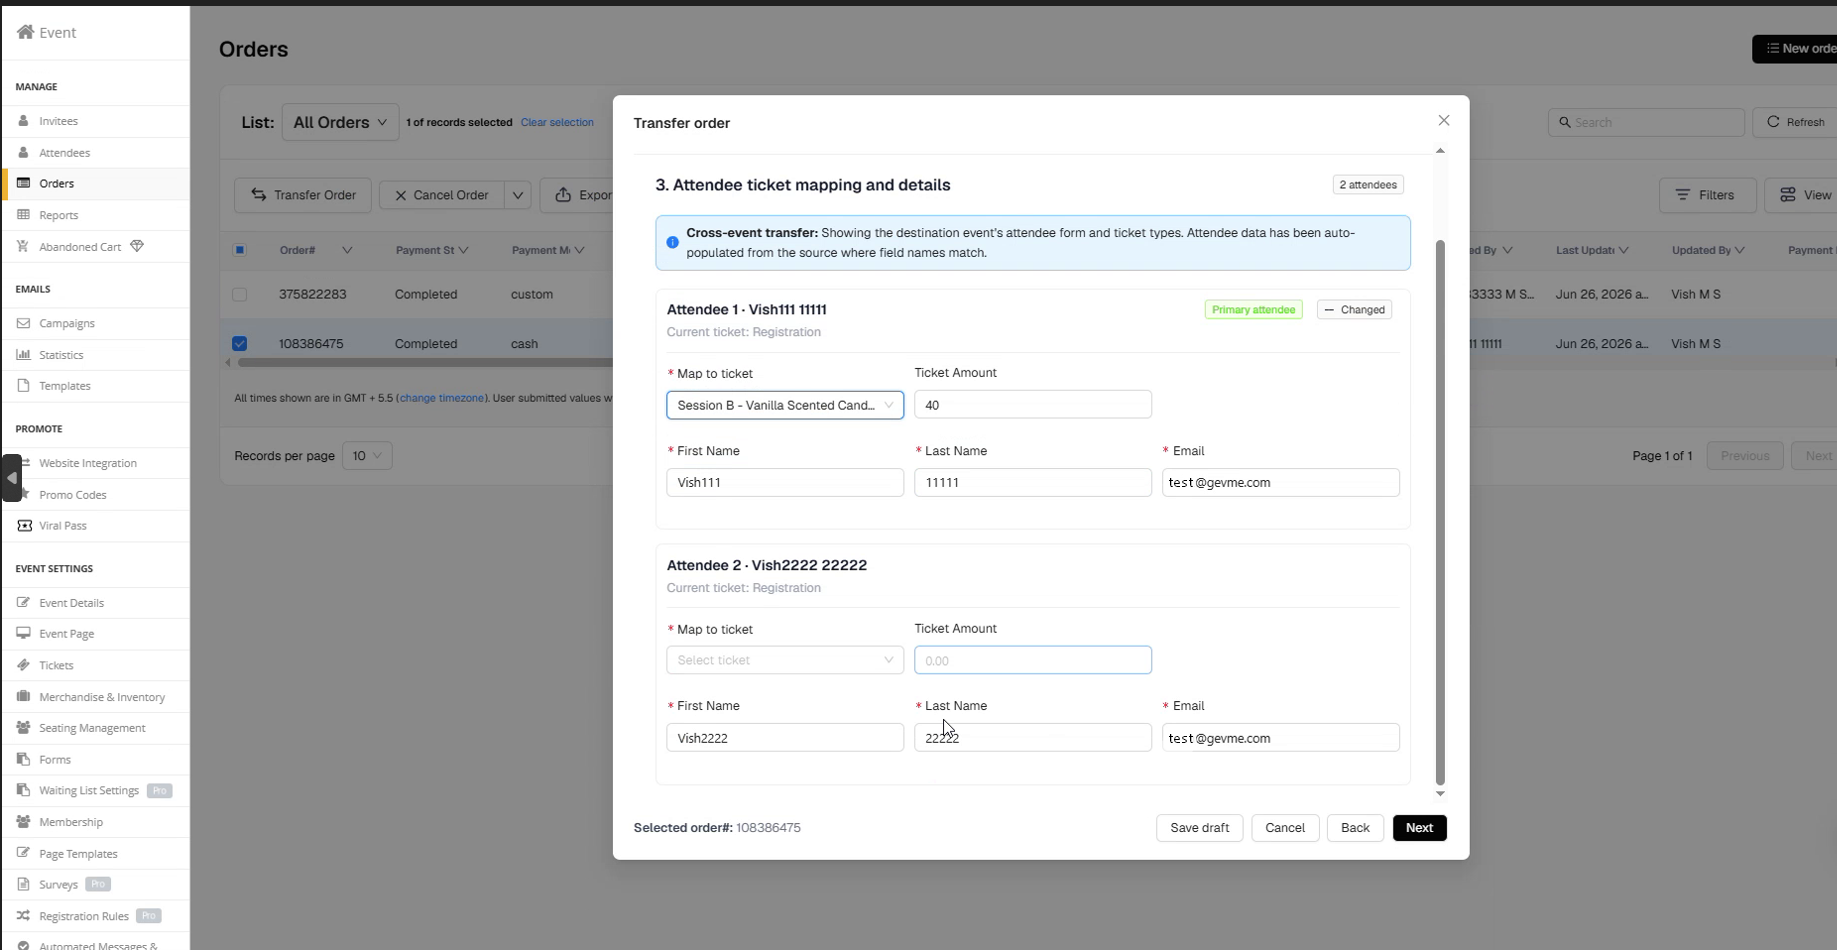
5. Map Tickets and Attendees
Map each ticket from the original order to the corresponding ticket type in the destination event.
You can also:
- Select the appropriate destination ticket type.
- Update ticket quantities where applicable.
- Edit attendee names and ticket assignments if required.
After completing the ticket mapping, click Next.
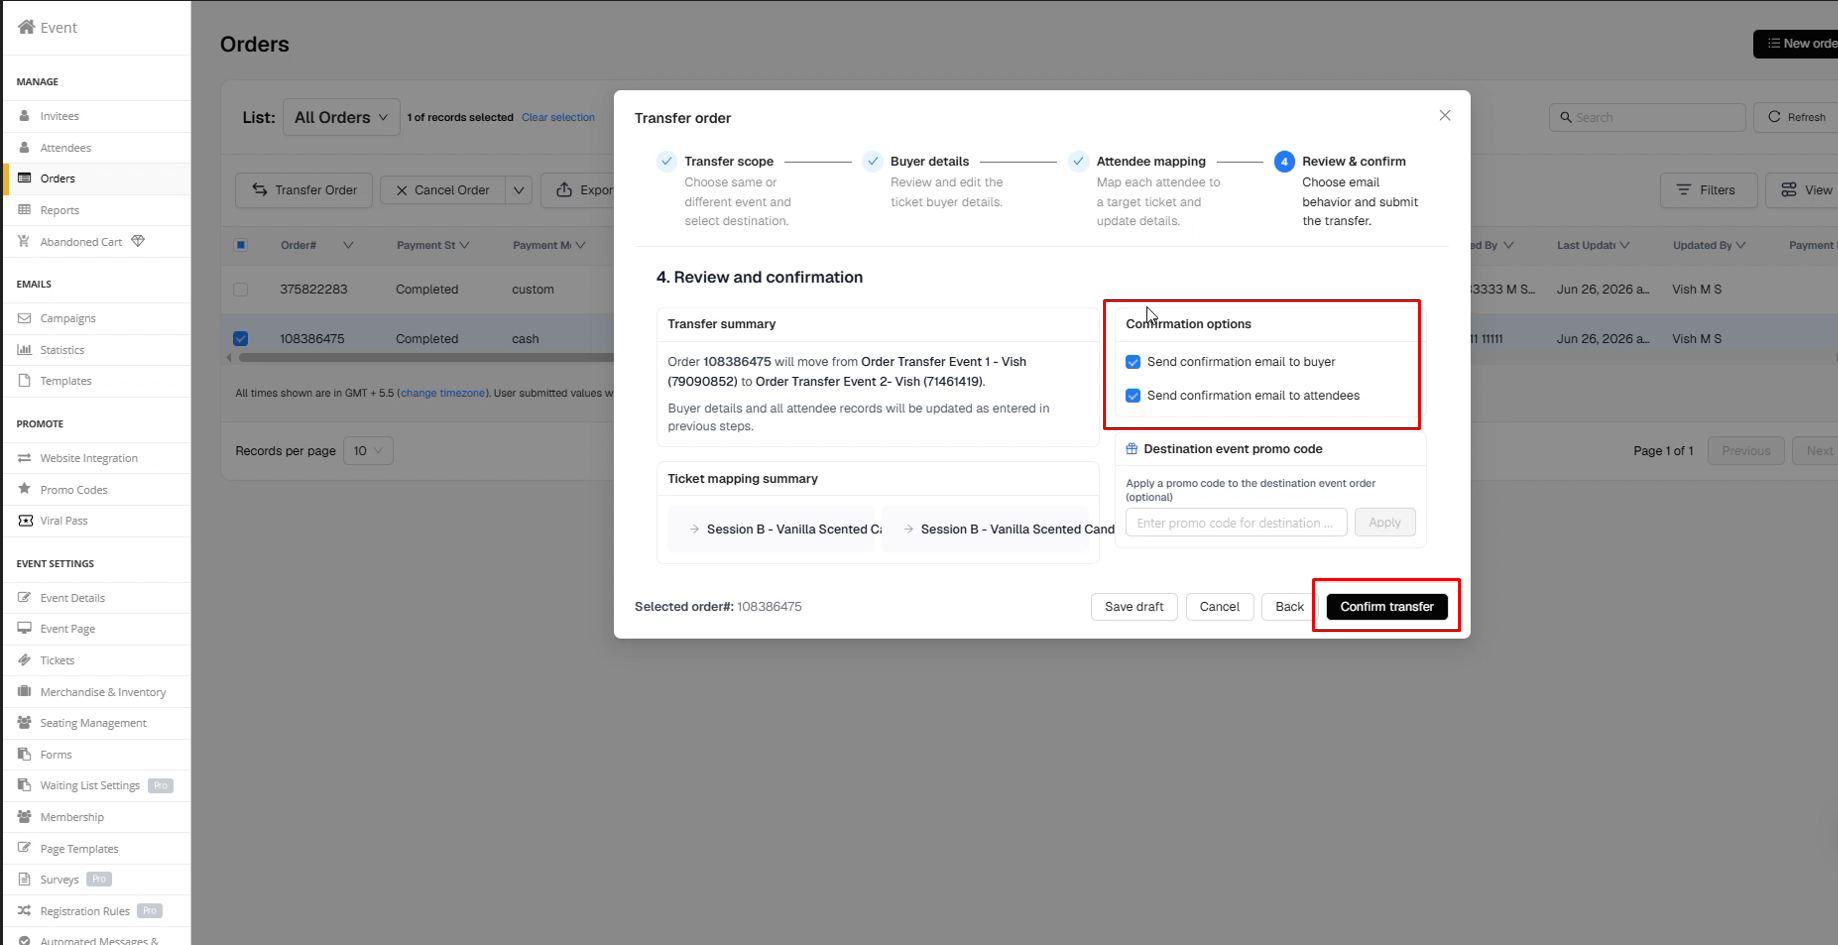
6. Review and Confirm
Review the transfer summary carefully before confirming.
You can optionally:
- Send a confirmation email to the buyer.
- Send updated tickets and confirmation emails to attendees.
- Apply a promo code to the destination order, if applicable.
Once everything has been verified, click Confirm Transfer.
7. Outcome
The selected order and its associated tickets will be transferred to the destination event.
After the transfer is complete:
- The order in the original event is cancelled, with a tracking note.
- The order will be available at the destination event.
- Buyer and attendee details will reflect the information provided during the transfer.
| Original Event | Destination Event |
|---|---|
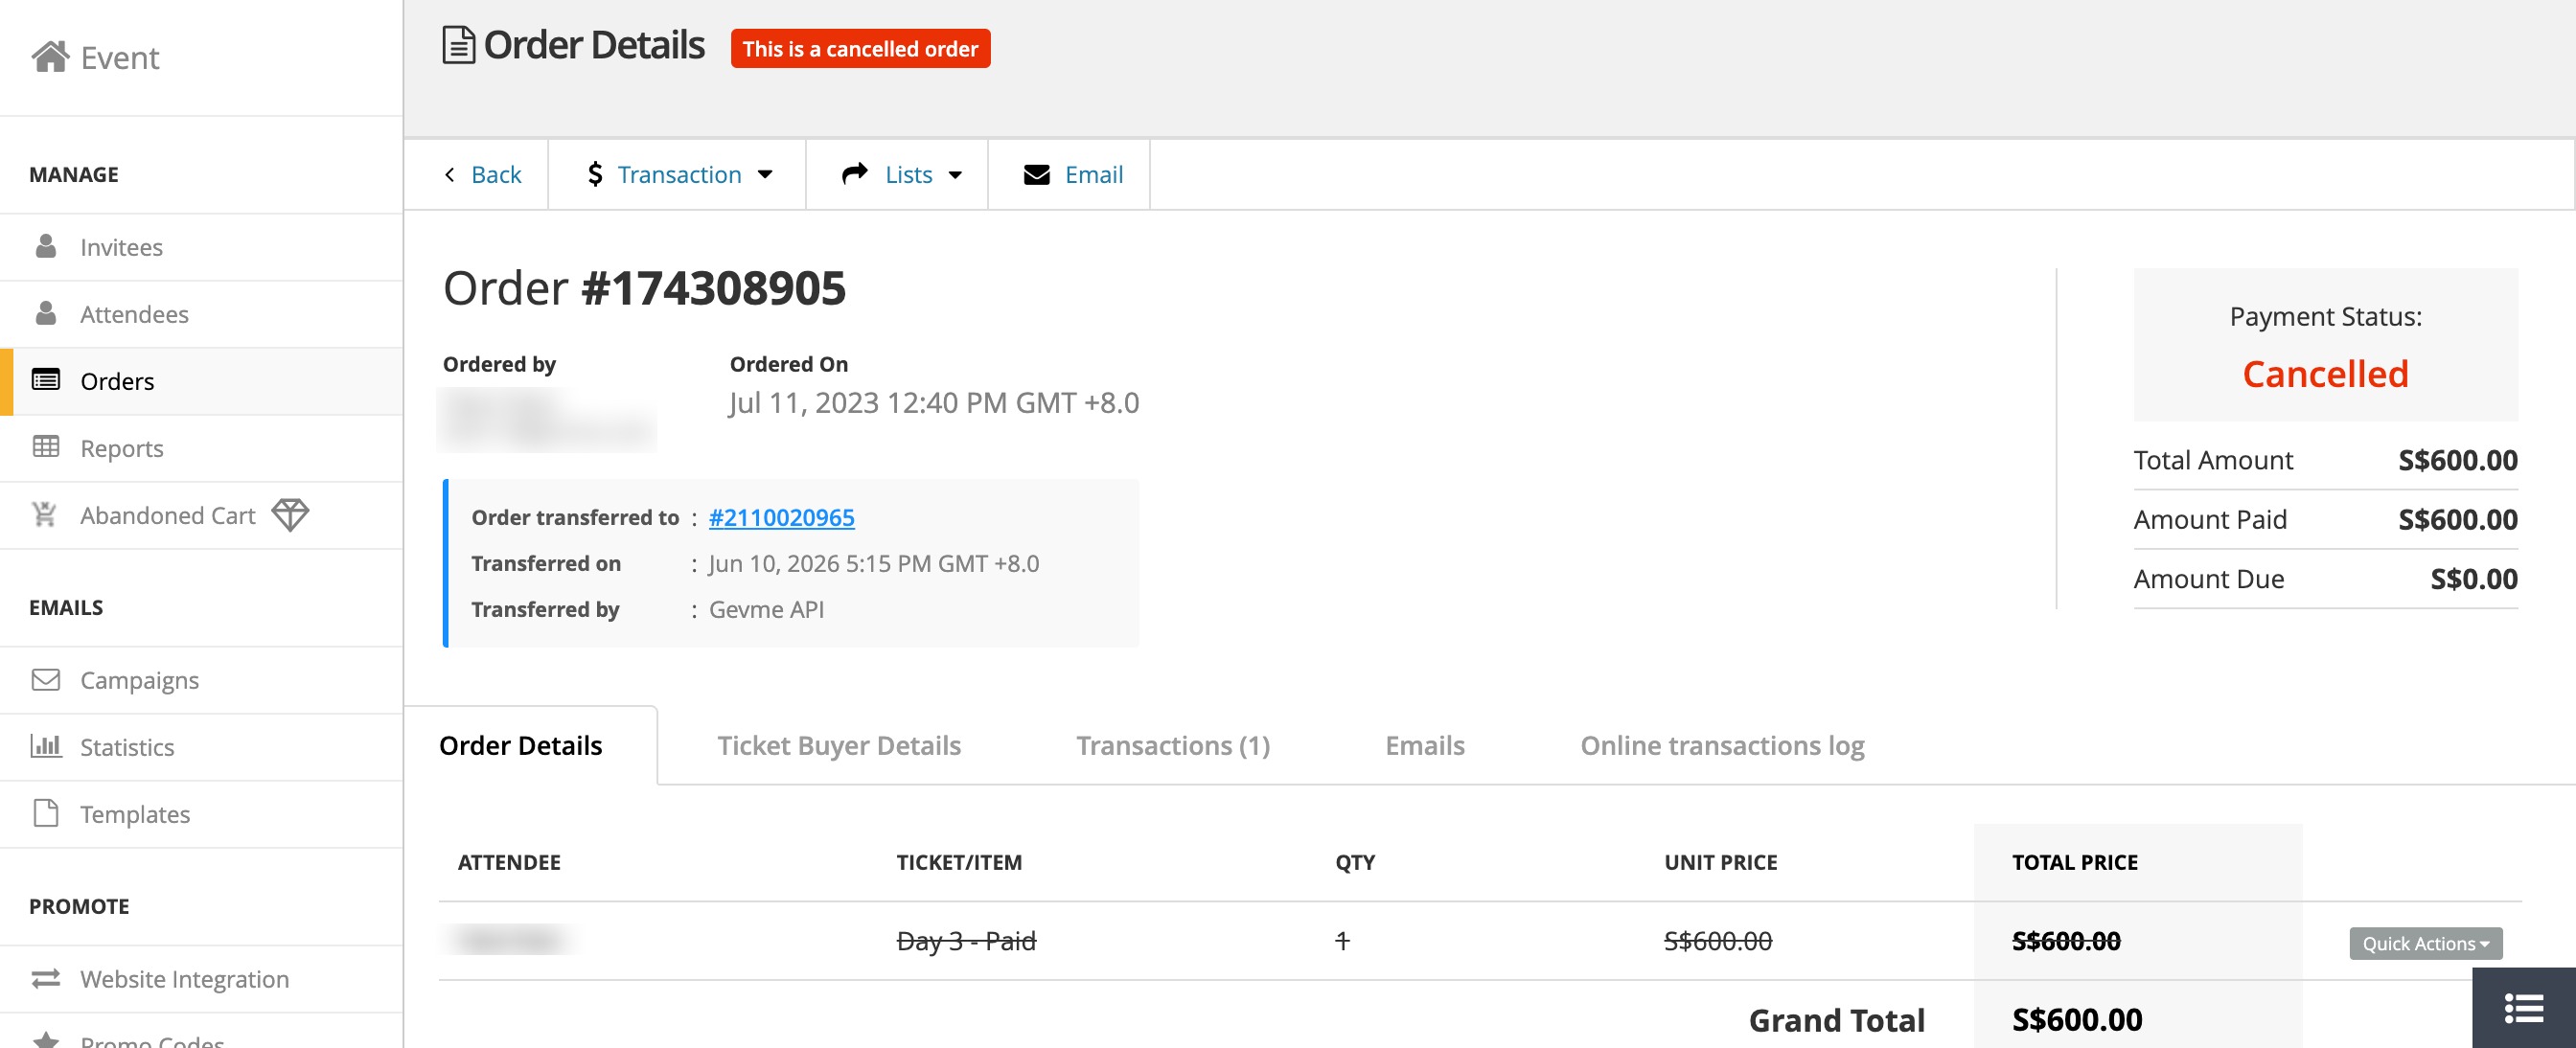 | 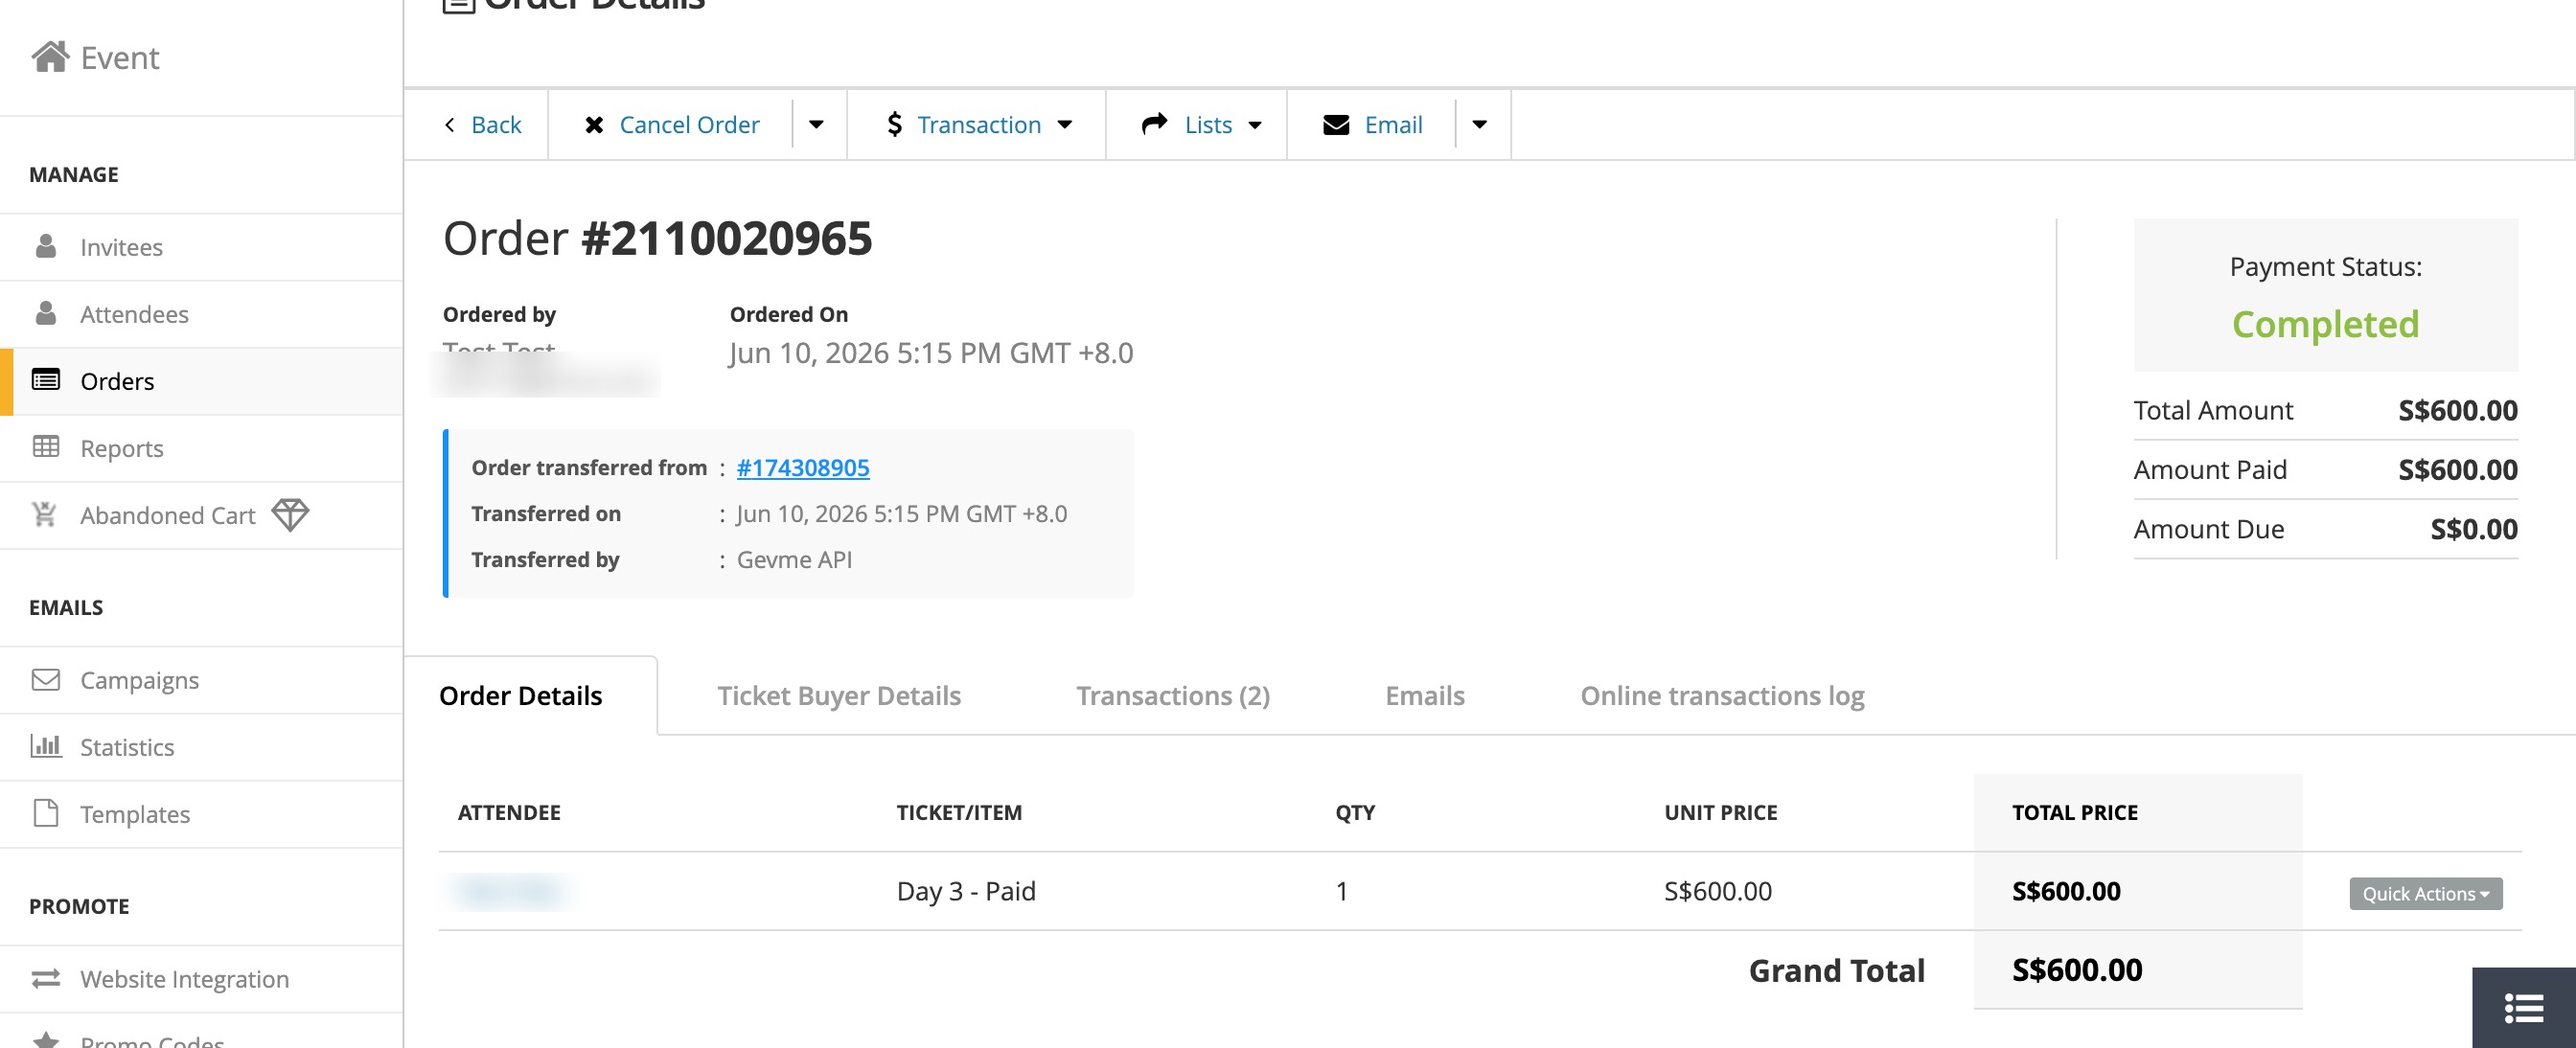 |